Redundancies in action usage
As we begin to build more and more stories, we'll find ourselves defaulting to similar sets of actions across story builds. You might copy and paste these actions from one story to another over and over – reformatting content, calling the same data set, or even a basic notification workflow.
The problem with this is that when you make a change to that set of actions in one story, it isn't reflected anywhere else.
As we start to see ourselves reusing the same exact set of actions, this is when we should stop and look for ways to be more efficient and effective. The best way to do that is send to story.
Send to story is awesome for reusing the same set of actions across stories. This also ensures when you make a change to that set of actions, it's reflected everywhere it's referenced.
Send to Story
What is the send to story action?
The send to story action allows you to create "sub-stories" that events can be sent to from other stories. The sub-story will then perform its actions and emit an event back to the original story when finished.
How it works
When the sub-story receives the event, it will:
Process the event through its workflow.
Perform any actions.
Then emit an event back to the calling action once finished.
You use the send to story action by specifying the story key in the action payload, pointing to the sub-story name.
How do you use send to story?
To start, you need to configure the reusable story for send to story. You do this by following these steps:
Enable a story for send to story by checking the "Enable for Send to Story" checkbox in the story settings.
Specify an
entry action(webhook type) andexit Action(message-only event transformation).
Then to use or reference that story, you will add the send to story action to the storyboard of another story.
Add the send to story action to the storyboard.
Configure the send to story action.
Add any payload data in the "payload" field required for the send to story.
In the below story, we can see what a story looks like that has been enabled as a send to story. On the surface it looks like a typical story. The big difference here is that we can use the blue send to story action to feed it a request to do things like submit a URL for it to do all the analysis and then continue your story.
Loading story...
Why is send to story useful?
Send to story introduces consistency by allowing your teams to reuse processes and actions across multiple stories. This is great for compliance and auditing purposes.
Some benefits of send to story include:
Reusability: You can create a "sub-story" with a set of actions and reuse that sub-story from multiple parent stories. This avoids duplicating the same actions in multiple places.
Modularity: Send to story allows you to break down complex processes into modular, reusable sub-processes. This makes your workflows easier to understand, maintain, and update.
Resiliency: Using send to story instead of copy-and-pasting the same set of actions to multiple places ensures that when a change happens (credentials update, change of tools, new software version), you make the update once vs. having to search for all the reference points.
Sharing: You can share send to story workflows across teams, allowing other teams to reuse your processes.
Updating: If you have a send to story, you only need to update the actions in one spot. This makes it so you don't have several points of failure by having the same actions needing to get updated in multiple stories.
DRY principle: By reusing sub-stories, you avoid duplicating the same actions in multiple parent stories, following the 'don't repeat yourself' (DRY) principle of software development.
In summary, send to story allows you to create reusable, modular processes that can be shared and composed to build complex workflows. This improves the maintainability, reusability, and organization of your Tines workflows.
My own templates?!
Other than accessing the action templates and pulling on pre-existing configured actions, you can also create your own library of commonly used configured actions. Essentially, you'll hit a point where you want to re-use the same action that you've copied and pasted so many times that you feel your hands getting tired.
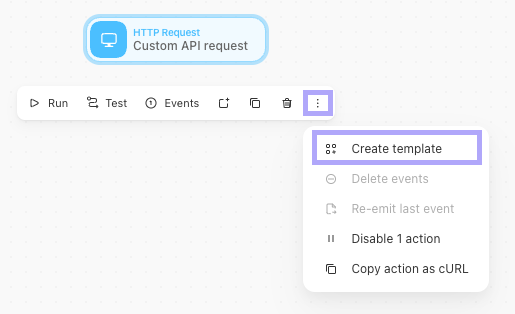
All you need to do is select the action, click the ..., and click "create template". From there, you can add the template's name and a description. Once you've done that, it'll now be accessible for you in the "Templates".
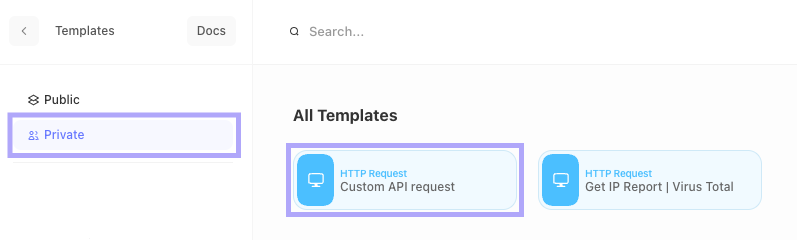
After the template has been created, we'll find it accessible when we click on the private tab of our templates. Making it so we can quickly pull in that preconfigured action from anywhere in our tenant.